Hi Everyone I’m back – now you’ve had a chance to shade your Ice Cream’s from the last tutorial, I’ll show you how to make a double Ice Cream card – painting with tissue paper, to create a candy stripe background with heat embossing.
Below I’ll give you a list of products you’ll need & a talk you through step by step in tutorial video. Let’s get started!
What You Need;
5×7″ Card Blank TLD – Ice Cream Treats Clear Stamp Set Watercolour Card Glitter Card Super Fine Gold Metallic Embossing Powder Embossing Powder Ink Pad Black Card Sequins Tissue Paper Hexagon / Rectangle Nesting Dies Foam Pads/Double Sided Tape Drys Clear Glue
Cardmaking Tutorial;
If you have any questions – comment below. Give this a go & share your creations with us on Facebook or tag us on Instagram @twinkle_lanedesigns Suzanne x
Hi Everyone Today I’m sharing with you a card I made using watercolour pencils with the Ice Cream Treats Stamp. Although I normally colour with alcohol markers & pencils, I do like to try different techniques when stamping images. In this step by step tutorial I’ll will talking you through how I stamped the Ice Cream using two different coloured ink pads.
Below we will list just what materials you’ll need.
What You Need
8×8 Card Blank TLD – Ice Cream Treats Clear Stamp Set TLD – 4mm & 6mm Mixed Coloured Pearls TLD – Sweet Treats Paper Pack Gold Mirror Card Watercolour Card White 210gsm Card Hexagon Nesting Dies Square Nesting Dies Memento Ink Pads – Desert Sand, Rose Bud, Dandelion, Bahama Blue Watercolour Pencils Embossing Folder
Step By Step
Step 1: With your square nesting dies – cut the largest to fit the 8×8 card blank in the gold mirror card. Then take the next die size down & cut a square in the white card.
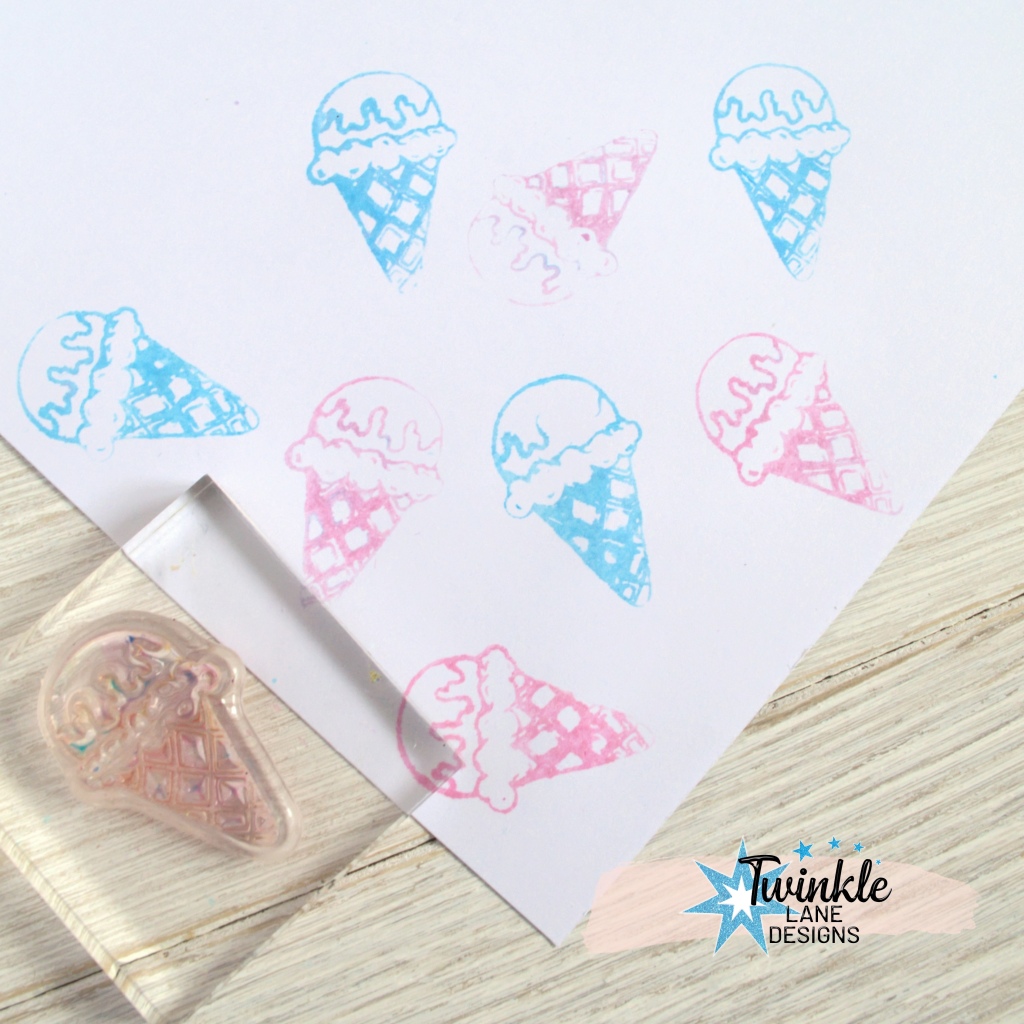
Step 2: Take your momento ink pads and on a glass matt – press a little ink down of each colour separately & add a touch of water to each inked dab. Now with the small ice cream clear stamp press the stamp into the first colour of watery ink & start stamping to create a backing paper on the white card. Don’t worry if the ink runs you want the mini ice creams to look like they have a watercolour/sketchy feel.
Step 3: Once background is finished & dry matt & layer the stamped background onto the gold mirror card & stick them both onto the card blank.
Step 4: Take a large hexagon nesting die which will fit the 8×8 card – cut the first hexagon in gold mirror card & with an embossing folder run it through your die cutting machine. With the next hexagon size die down cut a hexagon in the waffle paper from the Sweet Treats paper pack. With another hexagon die down cut a piece of watercolour card.
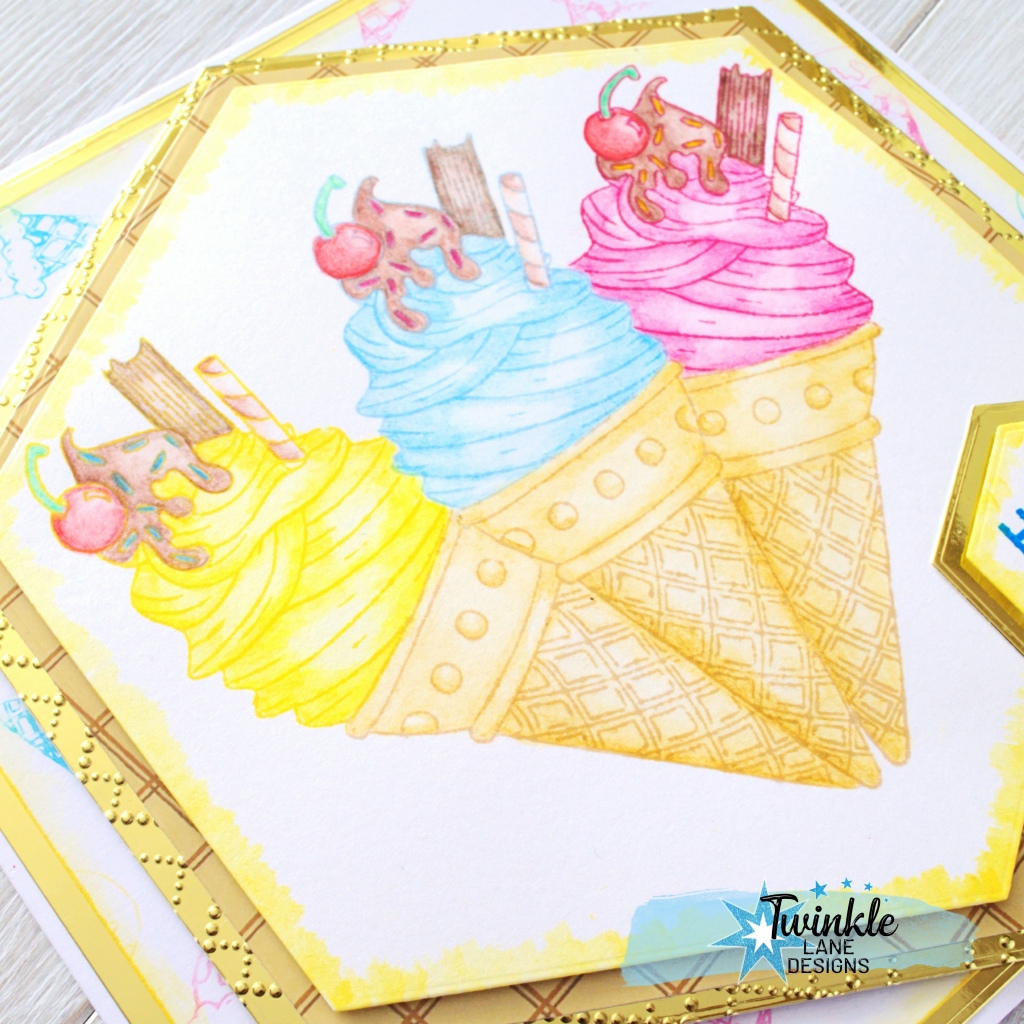
Step 5: Now with the watercolour card – your ready to start stamping the large Ice Creams (you will also need to create a mask on a scrap piece of paper) Start with the center cone – inking up just the cone of the ice cream with Desert Sand ink pad first – careful not to go over the top line of the cone. Now ink up the Ice Cream part of the stamp in your chosen colour – I’ve stamped blue for my first cone.
Step 6: Now repeat the stamping using different colour for the ice creams – masking off the center ice cream
Step 7: Using the watercolour pencils start painting the ice creams. Once you’ve finished ink around the edge of the hexagon.
Step 8: Finish off by matt and layering all the hexagons – I’ve put foam tape on the back of the watercolour card. Die cut small hexagons for the sentiment. Pearls have been glued into each corner
If you give this a go please share your creations with us on Facebook or tag us on Instagram @twinkle_lanedesigns Suzanne x
Hi Everyone If you’ve recently purchased some of clear stamps from the ‘Sweet Treats’Collection – we are going to bring you a new series over on our Youtube channel called ‘Colour With Me’ this will also include the floral stamps too. If you watched our show over on The Craft Store TV you’ll have seen me shading in the ice cream cone – but I’ve created a video so you can refer back to it when you want & even follow along. See below for the list of colours you will need to shade the cone & ice cream.
What You Need
We’ve used promarkers but you use the equivalent in the alcohol pens you use
FOR THE CONE; Pastel Yellow Tan Caramel
FOR THE ICE CREAM Soft Green Mint Green Caramel Cocoa Burnt Sienna Lipstick Red Burgundy Leaf Green Cerise Tan Putty
I’ve also used coloured pencils to make the colours pop.
Thanks for watching – show me your coloured Ice Creams by tagging us on Instagram @twinkle_landesigns Suzanne x
Have you had chance to take a look at the new Sweet Treat Collection? We have some beautiful samples created by our Design Team – using the Digital versions of the new stamp collection & papers. I love how they all had their own take on each of the designs – take a look through this gallery to get some inspiration for your creations.
Mowbray Designs
Helen Nile
Bhavya
Aren’t they lovely? Which is your favourite? Why not follow our DT over on Instagram! If you like any of the products shown here – all digital products available to purchase from Etsy; https://www.etsy.com/uk/shop/TwinkleLaneDesigns Or if you’d like the clear stamp version see our shop here on the blog
We are exciting to tell you we will be on The Craft Store TV tomorrow – this will be our second show. We will be bringing you a brand new collections, as well as bringing back the lovely Floral Clear stamps we showcased last time.
You can catch our show at 11am on Thursday 29th April 2021 – The Craft Store is available on channel 85 Freeview / 673 Sky / Freesat 817 and of course you can watch the show live over on their website; https://thecraftstore.com/ as well as purchase all the lovely products we will showing.
We will also be doing a giveaway over on our social media pages! As well as sharing with you all the fantastic card samples our design team and have created. As well as the one’s we have been working on too!